Posted on 4 Comments

Crosman 2240 Suppressor

Crosman 2240 Silencer

Crosman 2240 Suppressor

Just a quick update on my latest projects. I’ve wrapped up the Daisy Red Ryder scope mount design and have moved on to the Crosman 2240. I have received a few requests to make a Suppressor for the Crosman DPMS SBR Full-Auto. I finally got one and will be working on that soon. I’m also taking a look at the Crosman PFM16 and Umarex SA10.


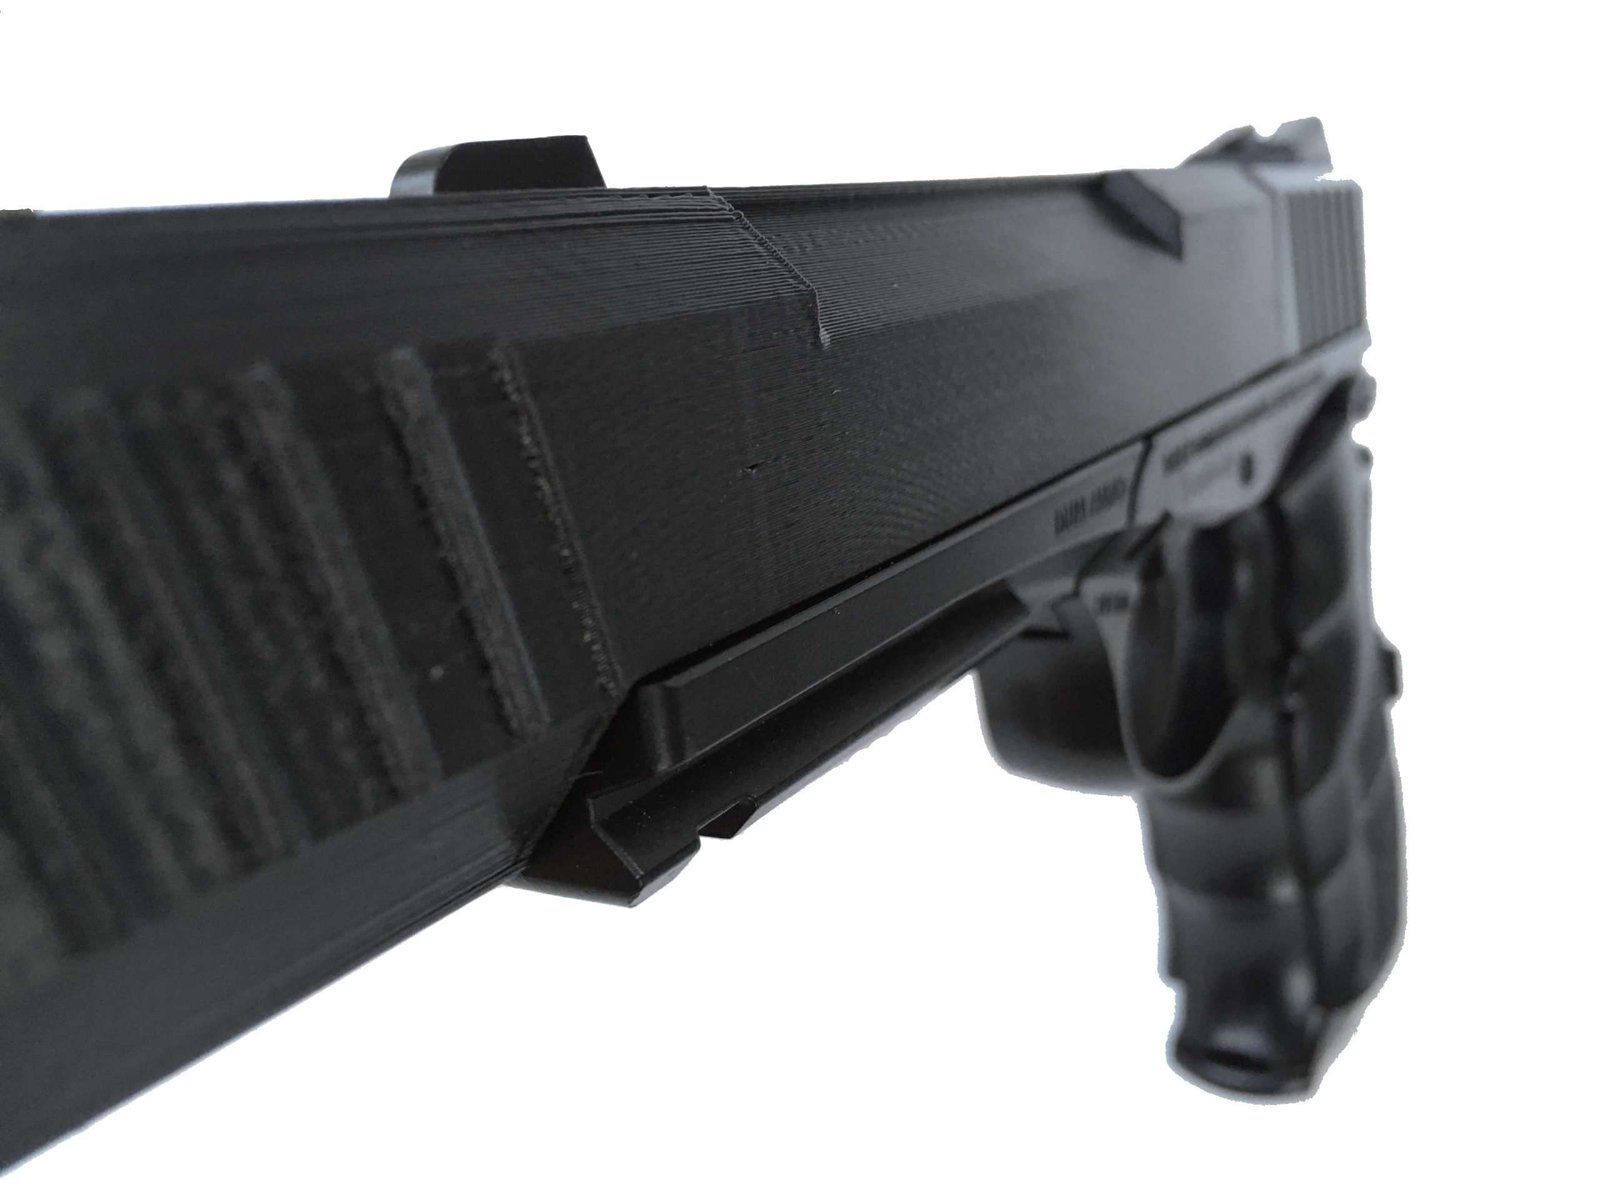
The 2240 Suppressor is very simple. It requires you to remove the stock front sight by just tapping it off with a hammer and piece of wood. Then you just press the suppressor on by hand with the front sight aligned. The only unique feature is the integrated front sight post. It is very similar to the 1322 Silencer on the inside in that it is round and has cone-shaped baffles.

The 2240 barrel has a flat ground on it that I used as an alignment feature for the front sight. I’m currently testing the Suppressor with various front sight post heights. I’m thinking that I might make it a bit on the high side. That way, it’ll cover close range shooting(if that’s your thing), but it could also be sanded down for longer range shooting. A benefit of the common ABS plastic blend used in 3D printing is that it dissolves in acetone. You can sand down the front sight post and use a paintbrush to coat the abraded surface with acetone to give it a smooth finish.

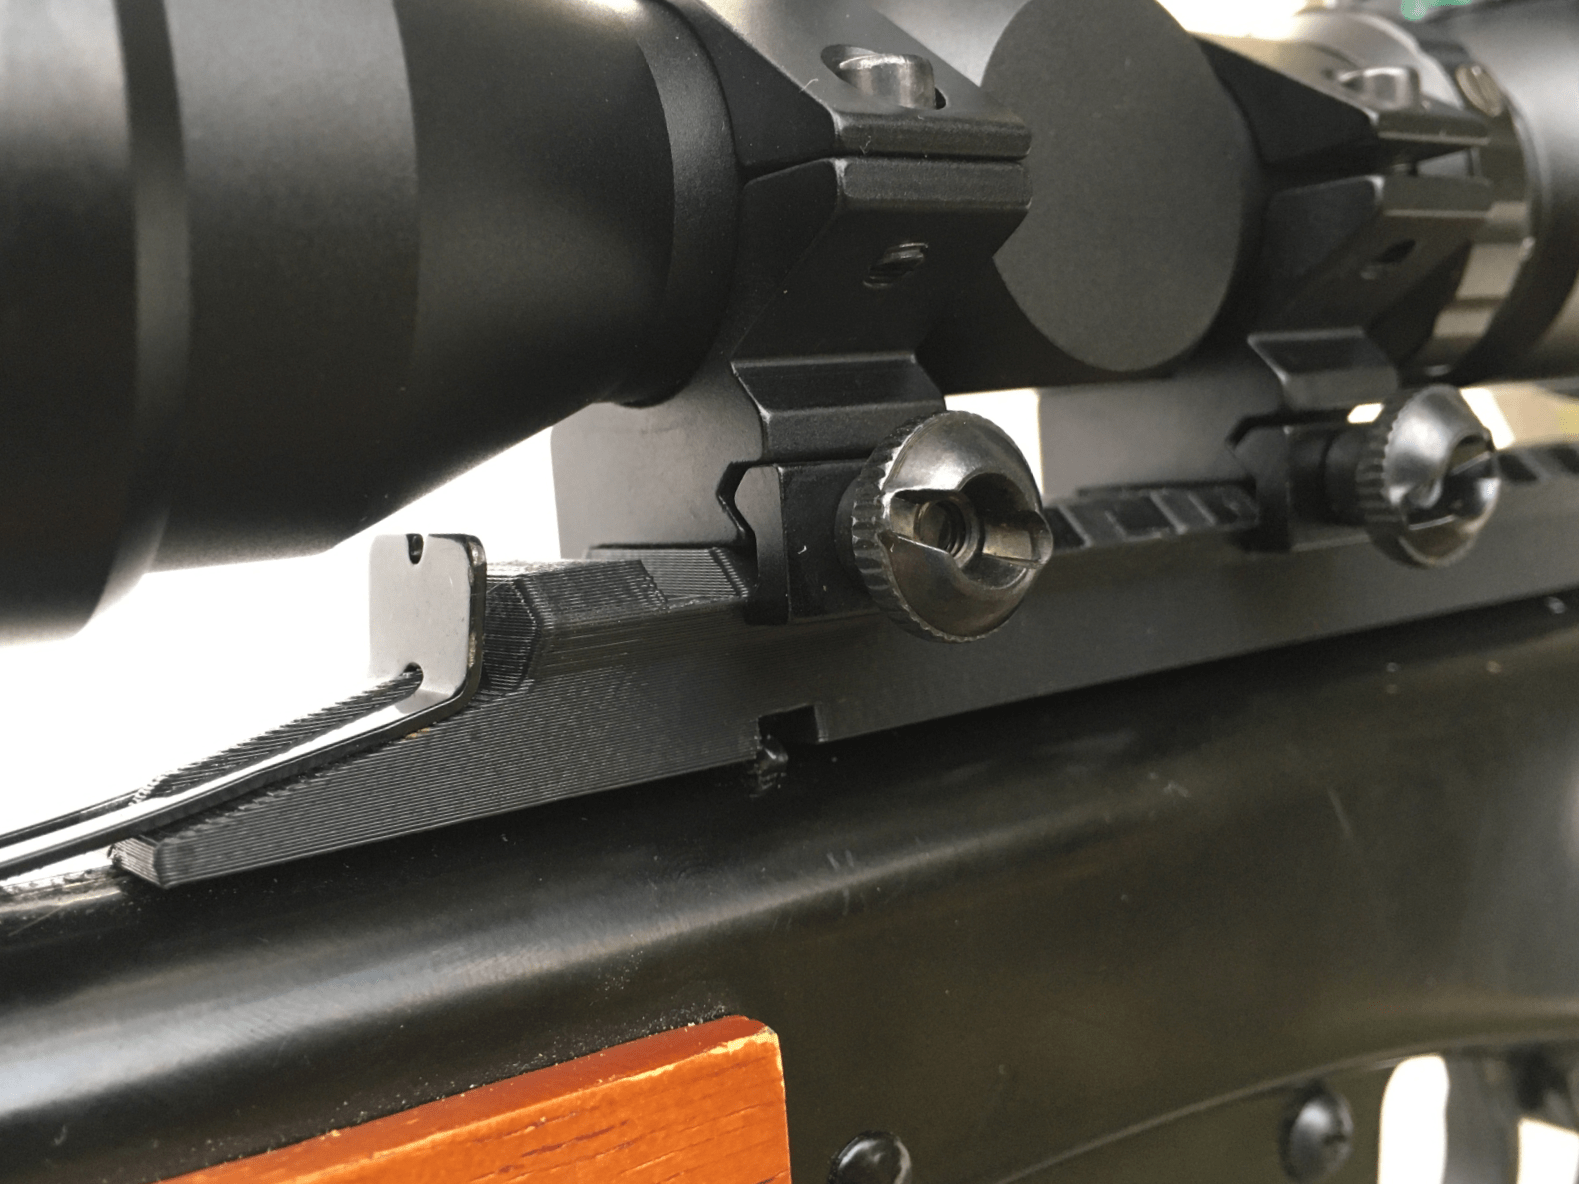
The Crosman Scope Mounts have really proven to be a hit. I didn’t imagine that they would be so popular. I’m grateful for all the feedback. The mounts are self-aligning on the 13XX and on the 2240. Check out the Crosman 2240 with the Suppressor, Scope Mounts, and Hawkeye Reflex Sight mounted below:

Crosman 2240 Silencer Mounts and Red Dot installed on the 2240

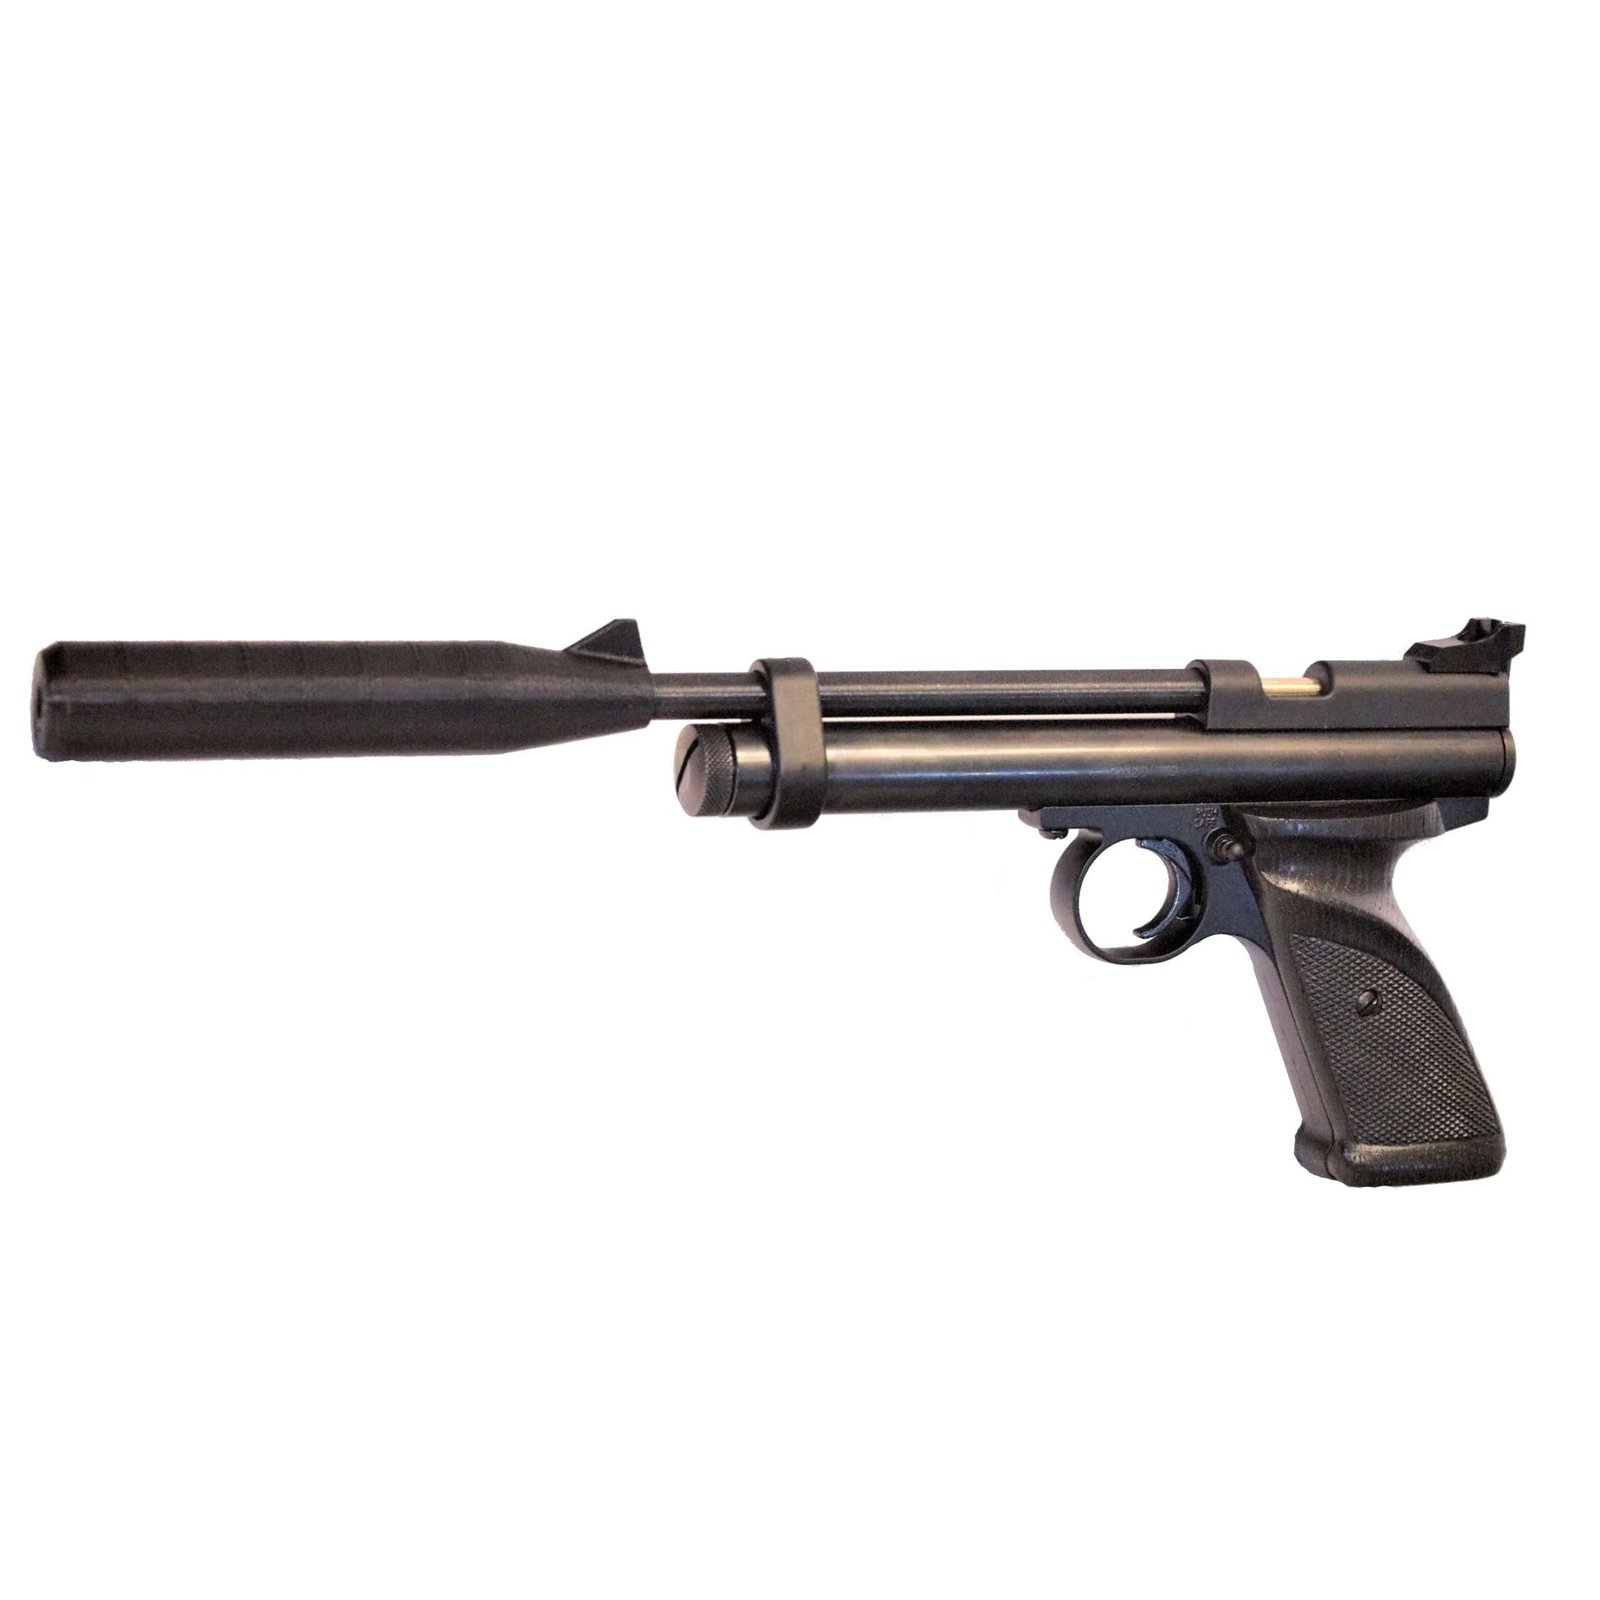
It may not look like it, but the cap and CO2 cartridge can be removed without removing the suppressor.

Thanks for readin’ ya’ll!

Posted on Leave a comment

Daisy Red Ryder Scope Mount

Red Ryder Picatiny Scope Mount with Scope Installed

My full-time job is in support of NASA and they’ve been under a continuing resolution until the government decides on the budget for FY2021. Long story short, I have not been working any overtime. This means some long overdue airgun projects are finally getting done. One of the earliest requests I received after creating the Little Buck Rail was to create a picatinny mount for the Red Ryder. There were already some out there so I didn’t make it a priority. With all this extra time on my hands I’ve come up with some ideas to set this scope base apart from the others. First of all, it will be a better value, secondly it will be a picatinny to afford you more optic options, and lastly it will be adjustable so that you can still raise or lower the rear open sight post. Take a look at what I’ve gotten done so far.

The adjustable part is still in the works, but I’m making good progress. Here is a view of the current concept:

The latest concept is slotted to allow you to slide the mount forward or backwards, as needed, to adjust the elevation. The trick is going to be getting the range right. Should I go with Daisy’s recommendation of 16.4 ft to out to 30 ft? 16 ft just seems way too close to me. Especially for folks putting scopes and red dots on this thing. I’ll keep testing it and see. I’ll update in another post when I’ve settled on the range. Keep in mind that I cant make it an infinite range. The longer I make the slot the weaker it will be and eventually you’ll have a whole lot of plastic hanging in the air over the butt. Feel free to comment and let me know your thoughts.

UPDATE 10/29/2020: I’ve completed this design and have listed them for sale here: https://buck-rail.com/product/daisy-red-ryder-picatinny-scope-mount/

Posted on 1 Comment

Daisy Powerline 408 Silencer Design

Daisy Powerline 408 Silencer with Dovetail Scope Mount

Daisy Powerline 408 Silencer Design


I received a request a while back to make a Silencer for the Daisy Powerline 408. I went out and bought one to have a look and see what I can do. I messed with it here and there for a while and finally came up with something I feel good about. I replaced the whole stock plastic part covering the barrel with a 3d printed one with a built-in suppressor and optics mount. I also was able to keep the front sight post if you prefer to shoot with open sights.

I started out by measuring and modelling the stock shroud. As you can see in the picture below there was a lot of features to get right. I lucked up and didn’t have to spend a lot of time optimizing it for 3d printing. I printed the shroud and installed all the guts without issue. Next, I added a printable silencer to the end and tested it out. If you’d like to check that out you can see it on YouTube HERE or look at my previous blog post.

I really like the 408. It’s nice to shoot pellets with a rifled barrel and CO2. Considering the decent accuracy you can get I though it might be nice to add an optics mount as well. My first few attempts were not great. The optics would clamp on the sharp edge of the dovetail rather than the grooves under the sharp edges. It would clamp really well, but deform the sharp plastic edges. Also, it was a challenge to make it look sleek and like it belonged on the gun. I eventually found a way to make the 3d printed dovetail functional and look like it belongs there. See below:

Finally, I added some of the little cosmetic details to tie it all together and printed the final prototype.

Final prototype 3d printed with ABS plastic.

These things take a long time to print(8hrs/piece) on an FDM printer at .2mm layers and would be pretty costly for a 3d printed part. I most likely will have them printed in PA12 Nylon by an American company given that the cost is comparable if done in bulk. Nylon is extremely tough and the SLS(Selective Laser Sintering) process leaves a very smooth finish. Here’s a little preview of a prototype that I’ve had printed in Nylon using SLS. When I finally put these up for sale they will have a similar finish.

Hopefully I’ll have them ready for early to mid-November. Thanks for reading!

Posted on 3 Comments

Daisy Powerline 408 Silencer Installation and Test

DAISY POWERLINE 408 SILENCER INSTALLATION AND TEST

In this video I show some quick details about the Daisy Powerline 408 Silencer, how it is installed, and do a firing test. It’s fairly brief and to the point. This is only a prototype and not what the final product will look like. Just a sort of progress report I guess… Thanks for watchin’

Posted on Leave a comment

International Shipping

INTERNATIONAL SHIPPING


We’ve had visitors from all over the world and have not had a good way for folks to place orders from outside the USA. In spite of that, we’ve shipped quite a few orders to the Netherlands, Canada, UK, Greece, Germany, Spain, Sweden, and Switzerland. We appreciate the international support. The website is still only in English, for now, but we’ve finally opened our website checkout to international customers. If you are ordering from outside of the US you will have an opportunity to choose an international shipping method at checkout. If you have any issues please don’t hesitate to reach out and we’ll be happy to help!

UPDATE: Due to COVID-19 travel restrictions some packages could take up to 45 days to arrive. Please bare this in mind when placing an order. So far, all international orders have been fulfilled, even if very delayed. Thank you.

Posted on 1 Comment

Installing a Scope or Red Dot on a 1322

I just uploaded a little video detailing how to use our Crosman scope mounts to mount an optic on the Crosman 1322. With our new mounts you can mount a 21mm picatinny or 3/8″ dovetail optic on the Crosman 1322, 1377, 1740, 1760, 2340, 2250, 2260, and 2289. I developed these as an improvement on the Crosman 459MT Intermounts. The same steps would be applied in installing a scope or red dot on any 7/16″ unobstructed barrel. The mounts can be found HERE and the Red Dot featured in this video can be found HERE. Thank for lookin’!

Posted on 4 Comments

Daisy Powerline 426 Silencer

Daisy Powerline 426 Silencer

Making the Daisy Powerline 426 Silencer

I’ve had a few requests for a silencer for the Daisy Powerline 426. It’s been a lot of work, but I’ve finally got something that will work without making alterations to the gun itself.

The biggest challenge to overcome is that it needed to somehow mount on the gun without damaging it. The Powerline 415 Silencer presses into the plastic barrel shroud, but there is too little space to do that in the 426. My first idea was to make little nubs that clutch the outside of the shroud. See below.

The first attempt at a gripping adapter

The adpater DID grip the gun, but it wasn’t secure enough. The next idea was to use the under barrel accessory rail along with the gripping nubs.

The first try at a 426 Silencer

The silencer worked and looked really cool and sleek, but I knew a lot of people would be disappointed that they couldn’t mount a laser as well. The next idea was to use the under-barrel accessory rail, and use the silencer as a base for a laser instead.

The finished Silencer Installed on the Daisy Powerline 426

This silencer has been updated quite a bit since this post. You can download the latest 3d print file HERE

Thanks for lookin’!

Posted on 5 Comments

Daisy Powerline 415 Silencer Test

Daisy Powerline 415 Silencer Test Featured Image

Daisy Powerline 415 Silencer Test

This is just a short video showing the sound difference without and with the 3D printed silencer on the Daisy Powerline 415 CO2 Pistol. I’m shooting Daisy Precision Max Steel BBs. This video really doesn’t do it justice, but you can certainly hear the difference. I shot at an archery target to take down some of the secondary noises.

UPDATE: I’ve listed the silencer for sale HERE

Posted on 5 Comments

Daisy Powerline 415 Silencer Build

Daisy Powerline 415 Silencer Build Part 1

3d Printed Silencer Inspired by the SilencerCo Osprey

My son just bought his first CO2 BB Pistol. I started him out with the Daisy Powerline 415 for ease of use… and low cost of course. He’s 10 and scrawny like me so I wanted to make sure it was easy for him to load and shoot. He read the manual(because I made him) and we set it up. It was getting dark outside, but I wasn’t going to let him go to bed without at least firing a couple of rounds. He fired the pistol and the sound really reverberated and got the neighborhood dogs barking. So my mind went straight to engineering mode, “we gotta make a silencer for this little thing.” So that’s what we did and it works great. I need to get my hands on a decibel meter, or perhaps get someone who has one to test it(anyone, heh? heh?) but until then you’ll have to just listen to the test video in Part 2.

Side Note: Is that trigger pull long, or what?! I always emphasize the importance of not yanking on the trigger, but it really takes some getting used to have such a long pull. He kept thinking that the gun wasn’t working right. Slowly pulling and pulling and pulling… “Dad, is the safety on?”


The Outsides

3D Printed Daisy Powerline 415 Silencer
3D Printed Powerline 415 Silencer
SilencerCO Osprey Silencer
SilencerCO Osprey

As you can see, in the above pictures, the design was inspired by the SilencerCO Osprey. I like that they match the profile of the pistol, so I went with the same look on the outside. I did a little research on the baffles of different silencers and decided to go with the cone type, rather than what is inside the osprey only because that seems to be tried and true and works well for 3D printing.

The Insides

In the picture below you can see the inside of the Osprey. That’s purrrdy.

SilencerCO’s Osprey Cutaway

In the picture below you can see my crappy cutaway. I chose 60 degree cone-like baffles, so they could print without any support. This would be impossible to injection mold in one piece.

Cutaway of 3d printed silencer for daisy powerline 415
My Really Junky Cutaway Sample(I blame the bandsaw)

To mount the silencer you just slide it in and it snaps in snuggly. I fired about 100 rounds without issue. It REALLY cuts down on the noise and doesn’t affect the accuracy a bit. By accuracy, I mean the standard random 4-5″ 10 yard grouping. My son loves the way it looks and I’m happy he can shoot in our backyard without concerning our neighbors now. I’ll probably add to the aesthetics a bit later and post the files to 3D print it. In part 2 I’ll post a video of the shooting test so you can hear the sound difference, so stay tuned.

UPDATE: I’ve listed the silencer for sale HERE

Posted on 3 Comments

Daisy Red Ryder Under-Barrel Rail Update

Daisy Red Ryder Under-Barrel Rail Update

I’ve been trying to perfect this under barrel rail mount for the Red Ryder. I’m technically on version 6, but the first 5 were essentially the same with small changes. The latest is 2 pieces rather than one. There has been a lot of interest. I’m surprised to find out that folks want to mount flashlights and lasers as well. The more my son uses the first version(view that post here) the looser it gets. It can slide up and down the tube beneath the barrel. It works for him and he really likes it, but he’s pretty easy to please. In this post I’ll briefly cover some of the obstacles and what my brother and I came up with for a solution.


The Obstacles

There are a few problems with a one-piece polymer rail. You can slide the adapter rail down the lower tube or have it snap onto the lower tube.The first obstacle to getting the rail adapter to slide over the lower tube is the tab that is used to weld the smaller tube to the larger. The hole in the adapter needs to allow for the tab to slide through and reduces the amount of surface area for gripping the tube.

Once I got the adapter to slide over the tab the next issue was that the lower tube is not perfectly parallel to the upper. Notice the air gap between the upper and lower tube. If the adapter is made to firmly clutch the lower tube at the front while simultaneously pushing up against the upper tube it will get looser and looser as you slide it toward the forearm grip.

Other Options

Another option is to make the one-piece adapter snap onto the lower tube rather than slide one. Either way, if it can snap on or slide on it can probably snap off or slide off. I don’t like the idea of adding set screws, or gluing, or taping because all of those can damage the airgun and aren’t exactly dummy-proof. I messaged with Cobalt327 from thehighroad.org forum and he confirmed that it’s best not to do anything that would alter the original gun, such as screwing into the forearm grip.

The Solution

Fortunately, I mentioned the problem I’m having with the rail to my brother. He came up with the simple idea of making it a two-piece clamp. The final version is a two-piece adapter that uses screws with embedded nuts to clamp the picatinny rail to the lower tube. I’ve tested it and it is VERY secure. I’ve been pretty busy, but I’ll be posting these for sale in the coming weeks. Thanks for reading and stay tuned!