Posted on 7 Comments

DIANA CHASER SILENCER

Diana Chaser Pistol with 3d printed silencer

DIANA CHASER THREADED SILENCER


I have a lot of new parts to release, but I couldn’t wait anymore on this one. This silencer is printed in Polymax Polycarbonate plastic. It takes 8 hours to print just one, but we get a much tougher product in the end. Some things that I’ve done differently with this one is include an expansion chamber at the muzzle, reduced ID baffles nearer the muzzle, and incorporated a stainless steel helical insert for very reliable threading/unthreading. This makes the Diana Chaser Pistol neighbor-friendly without affecting accuracy or muzzle velocity. Here’s a look at the inside:

Diana Chaser Silencer Designed and Modelled on Autodesk Fusion360

In this video I install the silencer and test fire the Chaser with and without it. I just got a new mic, so this video actually ALMOST does it justice. Also, you may notice another part I have in the works for the Chaser.

UPDATE! The suppressors are for sale HERE. The Barrel Bands are for sale HERE.

Thanks for looking!

-Terry

Posted on Leave a comment

Daisy Red Ryder Scope Mount

Red Ryder Picatiny Scope Mount with Scope Installed

My full-time job is in support of NASA and they’ve been under a continuing resolution until the government decides on the budget for FY2021. Long story short, I have not been working any overtime. This means some long overdue airgun projects are finally getting done. One of the earliest requests I received after creating the Little Buck Rail was to create a picatinny mount for the Red Ryder. There were already some out there so I didn’t make it a priority. With all this extra time on my hands I’ve come up with some ideas to set this scope base apart from the others. First of all, it will be a better value, secondly it will be a picatinny to afford you more optic options, and lastly it will be adjustable so that you can still raise or lower the rear open sight post. Take a look at what I’ve gotten done so far.

The adjustable part is still in the works, but I’m making good progress. Here is a view of the current concept:

The latest concept is slotted to allow you to slide the mount forward or backwards, as needed, to adjust the elevation. The trick is going to be getting the range right. Should I go with Daisy’s recommendation of 16.4 ft to out to 30 ft? 16 ft just seems way too close to me. Especially for folks putting scopes and red dots on this thing. I’ll keep testing it and see. I’ll update in another post when I’ve settled on the range. Keep in mind that I cant make it an infinite range. The longer I make the slot the weaker it will be and eventually you’ll have a whole lot of plastic hanging in the air over the butt. Feel free to comment and let me know your thoughts.

UPDATE 10/29/2020: I’ve completed this design and have listed them for sale here: https://buck-rail.com/product/daisy-red-ryder-picatinny-scope-mount/

Posted on 1 Comment

Daisy Powerline 408 Silencer Design

Daisy Powerline 408 Silencer with Dovetail Scope Mount

Daisy Powerline 408 Silencer Design


I received a request a while back to make a Silencer for the Daisy Powerline 408. I went out and bought one to have a look and see what I can do. I messed with it here and there for a while and finally came up with something I feel good about. I replaced the whole stock plastic part covering the barrel with a 3d printed one with a built-in suppressor and optics mount. I also was able to keep the front sight post if you prefer to shoot with open sights.

I started out by measuring and modelling the stock shroud. As you can see in the picture below there was a lot of features to get right. I lucked up and didn’t have to spend a lot of time optimizing it for 3d printing. I printed the shroud and installed all the guts without issue. Next, I added a printable silencer to the end and tested it out. If you’d like to check that out you can see it on YouTube HERE or look at my previous blog post.

I really like the 408. It’s nice to shoot pellets with a rifled barrel and CO2. Considering the decent accuracy you can get I though it might be nice to add an optics mount as well. My first few attempts were not great. The optics would clamp on the sharp edge of the dovetail rather than the grooves under the sharp edges. It would clamp really well, but deform the sharp plastic edges. Also, it was a challenge to make it look sleek and like it belonged on the gun. I eventually found a way to make the 3d printed dovetail functional and look like it belongs there. See below:

Finally, I added some of the little cosmetic details to tie it all together and printed the final prototype.

Final prototype 3d printed with ABS plastic.

These things take a long time to print(8hrs/piece) on an FDM printer at .2mm layers and would be pretty costly for a 3d printed part. I most likely will have them printed in PA12 Nylon by an American company given that the cost is comparable if done in bulk. Nylon is extremely tough and the SLS(Selective Laser Sintering) process leaves a very smooth finish. Here’s a little preview of a prototype that I’ve had printed in Nylon using SLS. When I finally put these up for sale they will have a similar finish.

Hopefully I’ll have them ready for early to mid-November. Thanks for reading!

Posted on 3 Comments

Daisy Powerline 408 Silencer Installation and Test

DAISY POWERLINE 408 SILENCER INSTALLATION AND TEST

In this video I show some quick details about the Daisy Powerline 408 Silencer, how it is installed, and do a firing test. It’s fairly brief and to the point. This is only a prototype and not what the final product will look like. Just a sort of progress report I guess… Thanks for watchin’

Posted on Leave a comment

Mounting a Bipod on the Red Ryder

Mounting a Bipod on the Daisy Red Ryder

Why Add a Bipod?

Shooting a Daisy Red Ryder is a blast. For my youngest kids it can be difficult to hold up and takes two fingers to pull the trigger. A bipod is a huge help to get them comfortable and having fun shooting.

The Problem

For the Daisy Buck you can just buy a clamp-on barrel adapter and mount a folding bipod on the adapter. But the Red Ryder has a faux magazine(a little tube under the barrel) that prevents you from mounting a bipod. The only solution is to use a temporary prop or support or cut the faux magazine off and mount the same clamp-on style. Neither of those “solutions” is ideal.

The Solution

So I drew up a model in AutoCAD of an adapter that will slide over the faux magazine. Something like this.

The model in AutoCAD
Setting up for 3D printing

This will allow you to keep the original gun intact while adding an under-barrel picatinny rail. From there you can mount a folding bipod like this on your Daisy Red Ryder.

finished bipod adapter for the daisy red ryder
Finished Bipod Adapter

What do you think? Are you interested in this product? If you are let me know in the comments! Also, I just got a shipment of bipods and red dots that will be listed at an unbeatable price next week! Stay tuned or subscribe to get updates on new products!

Posted on Leave a comment

Daisy Red Ryder and Buck 105 Compared

Red Ryder vs Buck 105 in same frame

The Daisy Red Ryder VS The Buck 105 For Young Shooters

The Daisy Red Ryder is the most popular BB Gun ever made. It is a timeless design and is still just as much fun for an adult as it is for kids. The Daisy Buck 105 is the Red Ryder’s little brother, but definitely has it’s advantages. In this article I’d like to briefly point out two major strengths and weaknesses in comparison to the other. I think it comes down to size, looks, and price. Originally I published this article to say, “size and power.” It has since changed and you’ll find out why below.

Side-By-Side Comparison

Red Ryder vs Buck 105 in same frame

The Size Makes a Difference

As you can see there is definitely a significant size difference. That’s one of the most important differences and a huge deciding factor in which one to purchase for younger children or adults. According to Daisy, both guns are recommended for kids 10 and older. If you’re in the market for a kid who is younger than that I’d say the Buck will easily be the best way to go. My 10 year old loves his Daisy Red Ryder, but still prefers his little sisters Buck because it’s so much easier for him to handle

We Need More Powa!

It’s not listed in the chart, but Daisy lists the two guns with significant power differences. They claim the Red Ryder shoots at 350 FPS while little brother Buck is just pushing 275 FPS. The only problem is that they have exactly the same powerplant and have been tested to average the same muzzle velocity at around 275 FPS. But don’t lose hope… There is a way to get more power from both. A lot more power! Find out more HERE.

Other Considerations

Looks is certainly something to think about after considering usability. What good is a good looking gun the kid cant comfortably shoot? As far as that goes those differences are obvious. The Red Ryder basically has some features that the Buck lacks. There is a longer butt, longer barrel, forearm grip, small faux magazine under the barrel, and a “saddle ring with a leather thong.” Apart from those things there aren’t much differences.

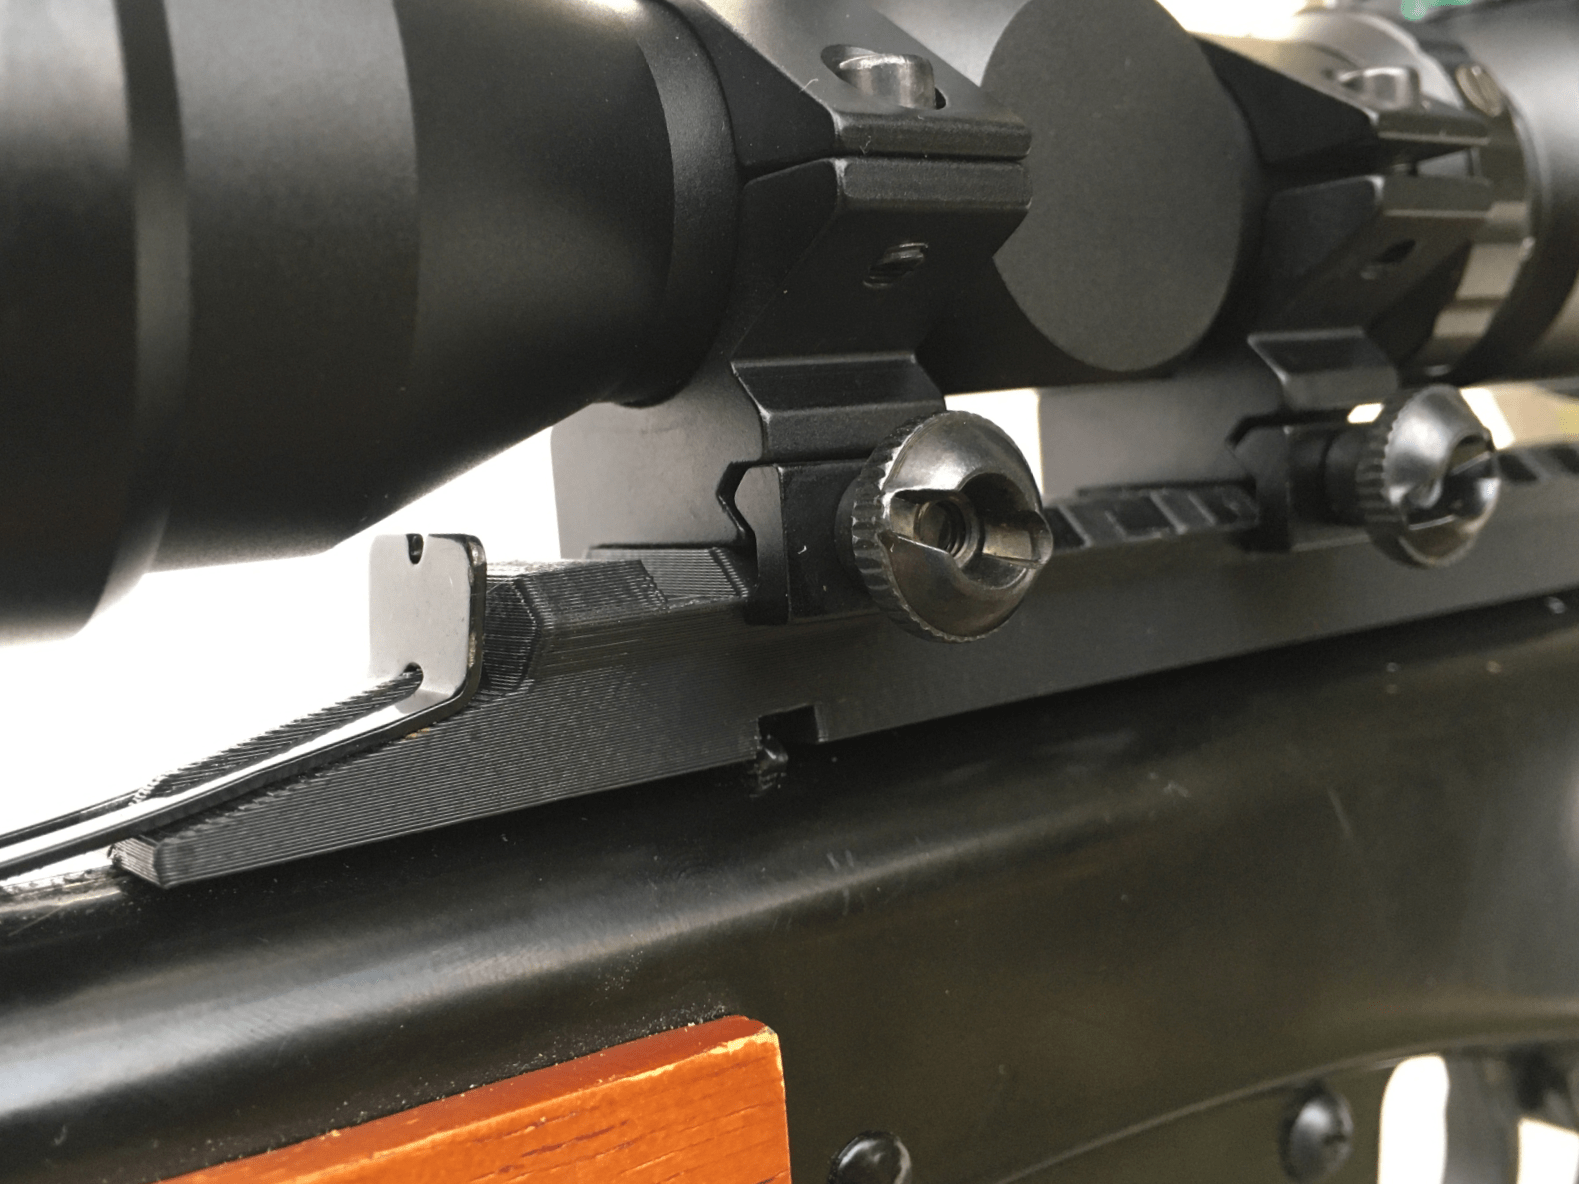
There is, however an adjustable(elevation) open rear sight on the Red Ryder. The Buck only has a fixed rear sight. You can add a scope base to the Daisy Buck or Red Ryder and mount an optic that allows for a more precise and adjustable sight picture.

Price

On 8/20/2019 the price for the Red Ryder Model 1938 is $25 on Amazon and the Daisy Buck 105 is $18. Both are incredibly cheap and you get a lot for your money, but $7 is a pretty significant price difference at that price range. Especially considering that you are not necessarily paying for better performance.

Summary

The Red Ryder may be the winner for bigger kids and adults due to it’s larger size and forearm grip, but the Buck is the only choice for the younger ones and those on a tight budget.

Modifications and Accessories

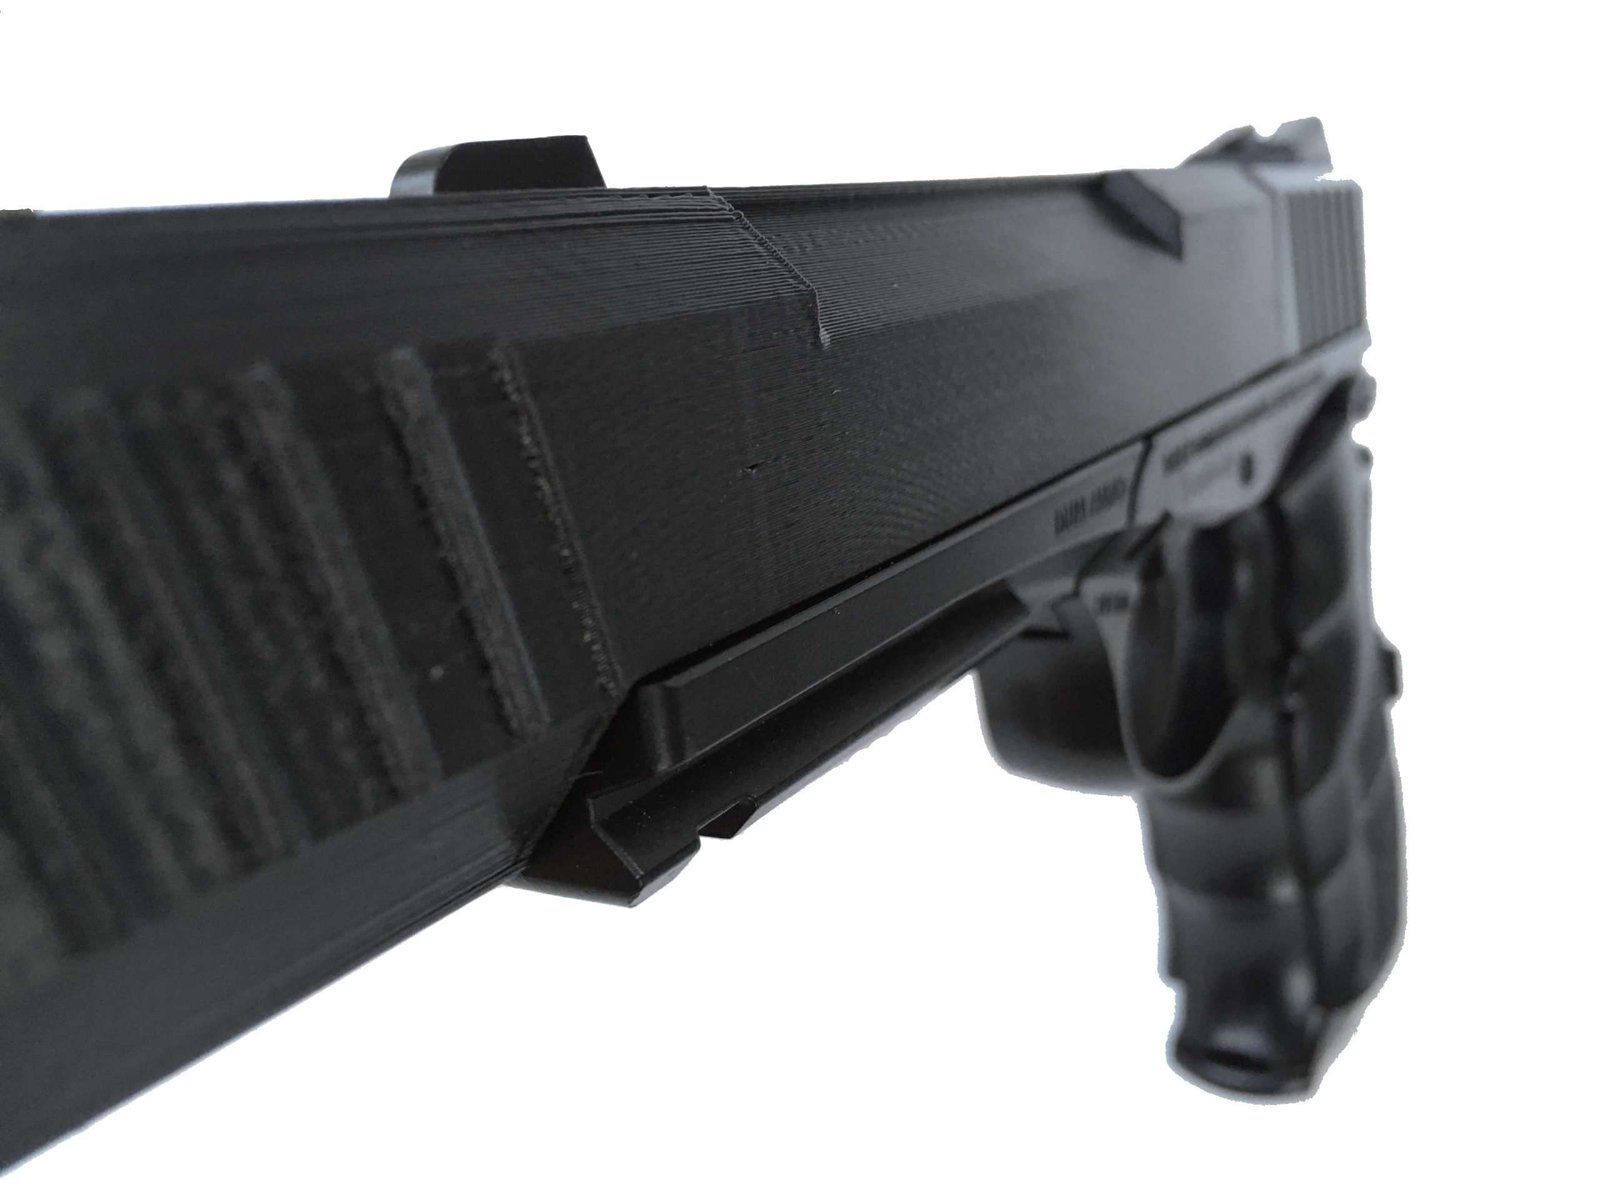
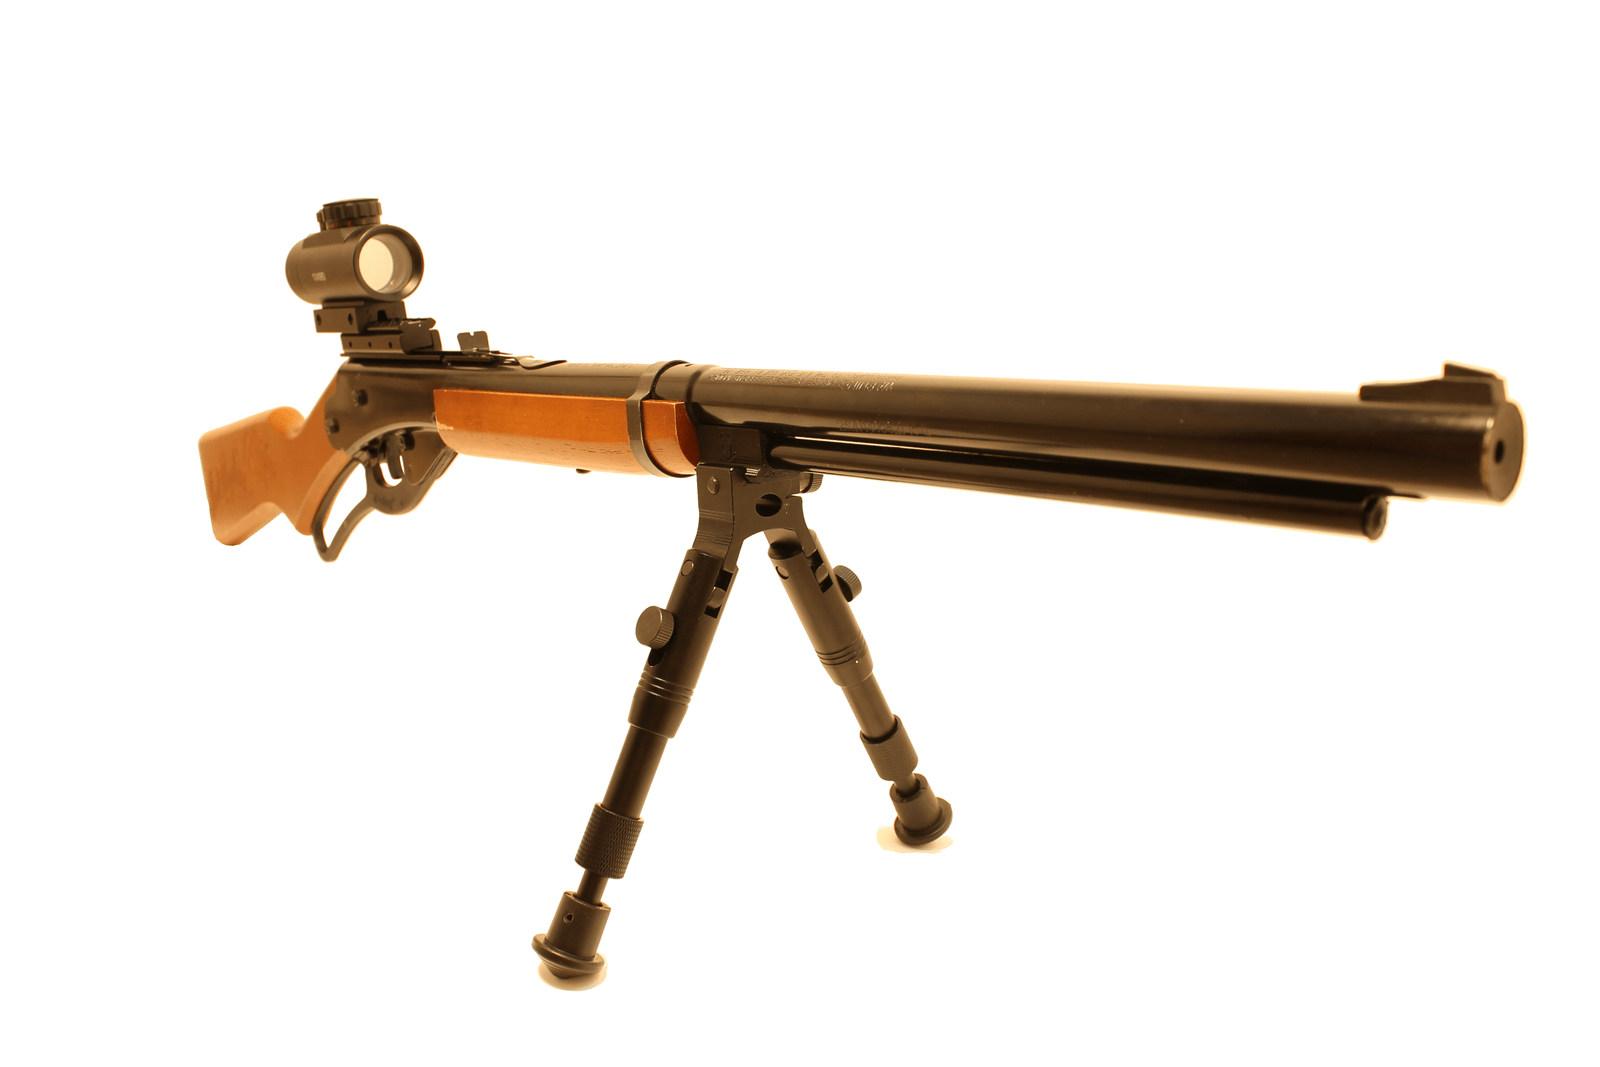
Modifications and accessories can really change the game. For instance, you can cut down the stock and make the trigger more sensitive to make the Red Ryder more comfortable for younger kids. Also, you can add a scope or other optics to the Red Ryder using aftermarket scope mounts. Many Buck and Red Ryder parts are also interchangeable and can be switched to suit your needs.

With The Little Buck Rail, you can also mount a scope on the Daisy Buck. I’ve also added folding bipods that are compatible with the Buck and I’ve developed an adapter to mount a Bipod or other under-barrel accessory on the Red Ryder as well. Thanks for reading!