Posted on Leave a comment

Daisy Red Ryder Scope Mount

Red Ryder Picatiny Scope Mount with Scope Installed

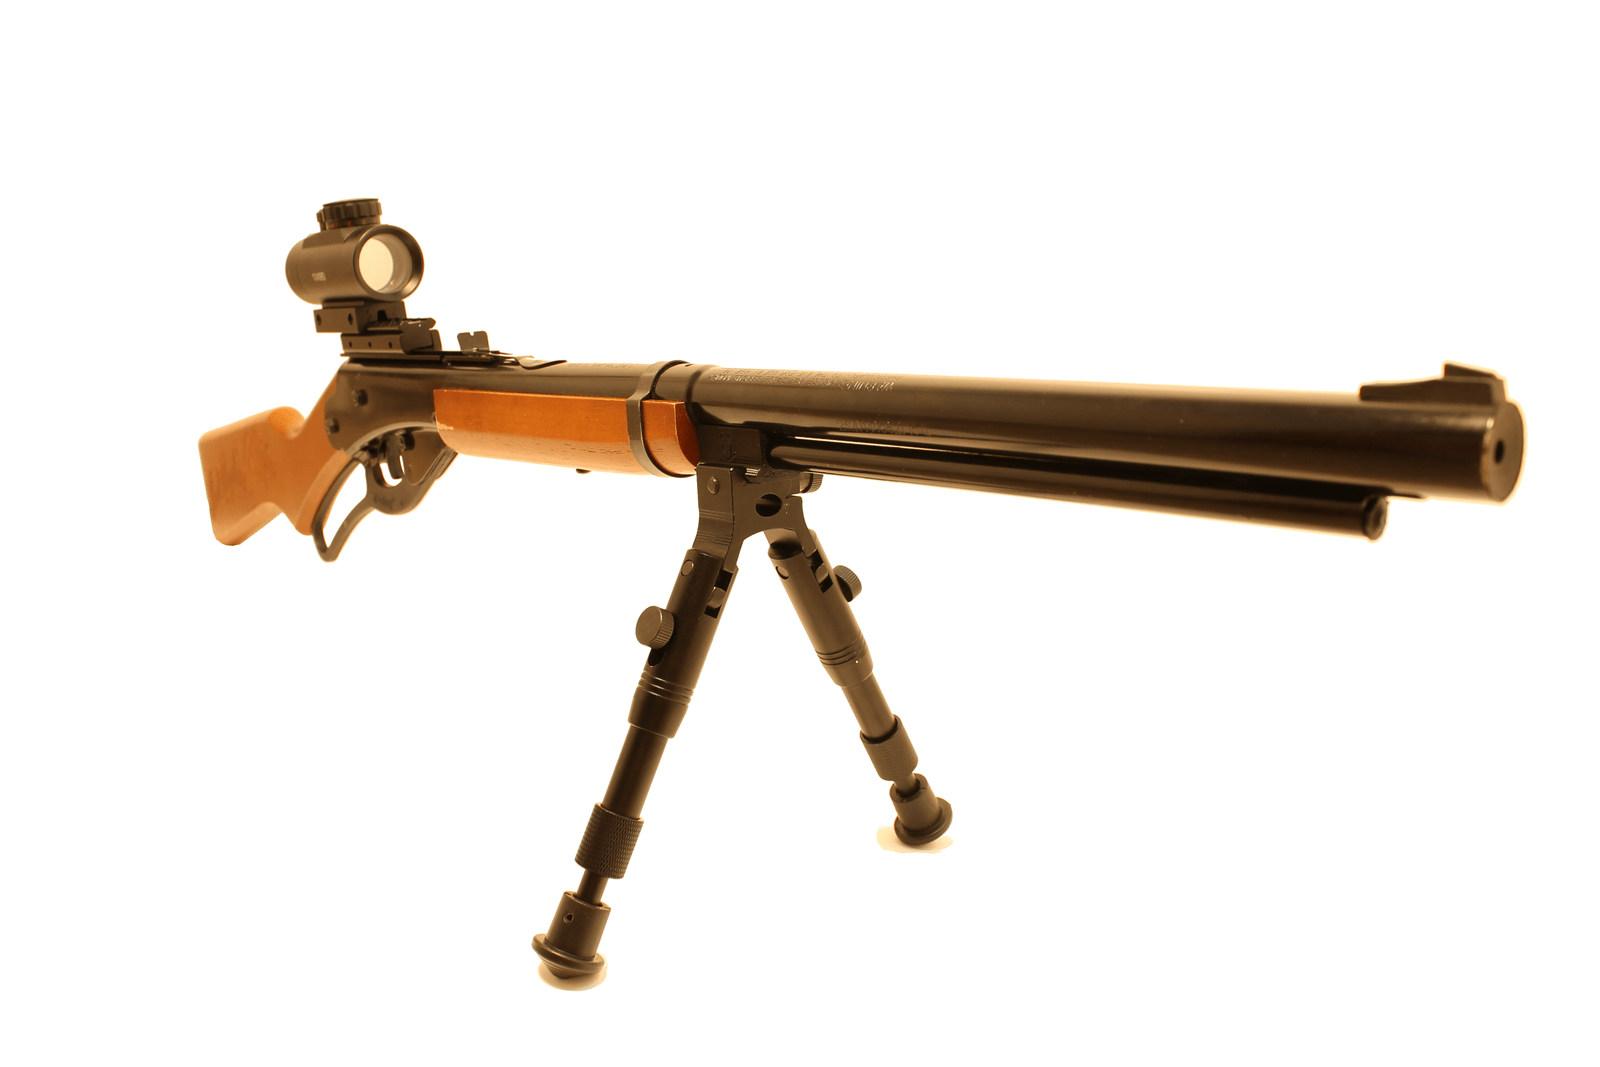
My full-time job is in support of NASA and they’ve been under a continuing resolution until the government decides on the budget for FY2021. Long story short, I have not been working any overtime. This means some long overdue airgun projects are finally getting done. One of the earliest requests I received after creating the Little Buck Rail was to create a picatinny mount for the Red Ryder. There were already some out there so I didn’t make it a priority. With all this extra time on my hands I’ve come up with some ideas to set this scope base apart from the others. First of all, it will be a better value, secondly it will be a picatinny to afford you more optic options, and lastly it will be adjustable so that you can still raise or lower the rear open sight post. Take a look at what I’ve gotten done so far.

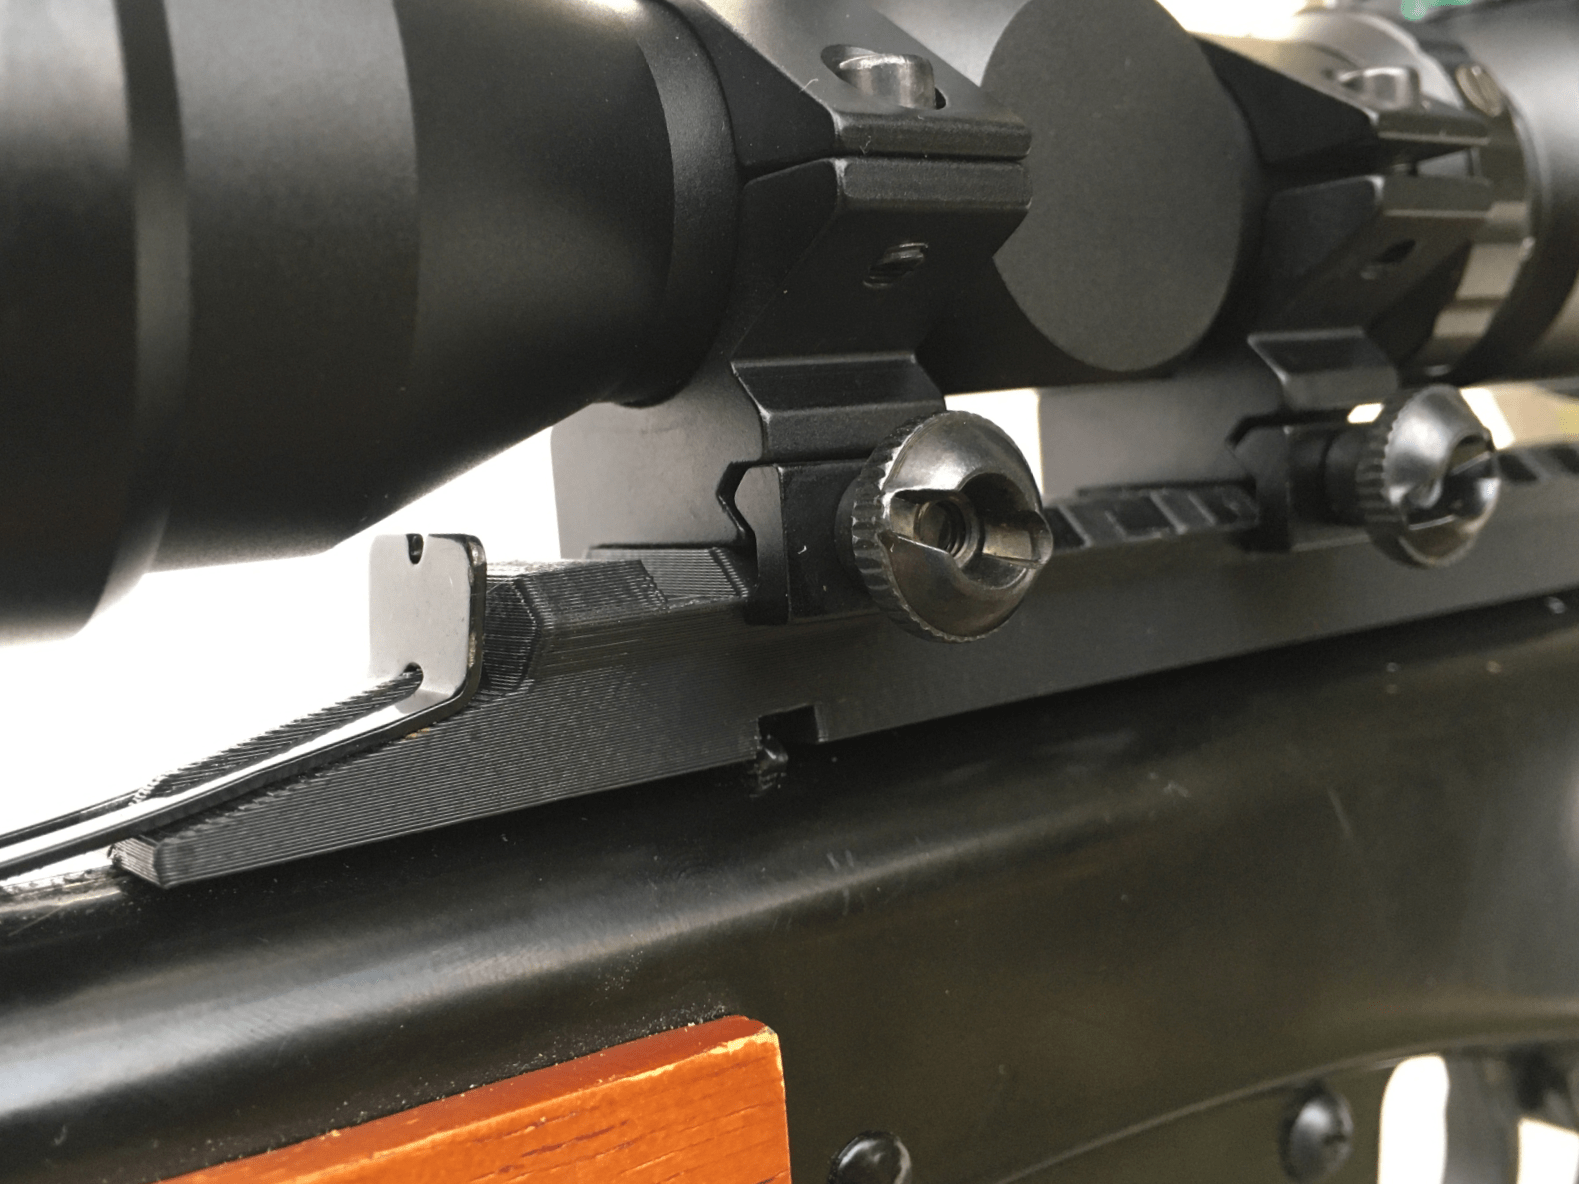
The adjustable part is still in the works, but I’m making good progress. Here is a view of the current concept:

The latest concept is slotted to allow you to slide the mount forward or backwards, as needed, to adjust the elevation. The trick is going to be getting the range right. Should I go with Daisy’s recommendation of 16.4 ft to out to 30 ft? 16 ft just seems way too close to me. Especially for folks putting scopes and red dots on this thing. I’ll keep testing it and see. I’ll update in another post when I’ve settled on the range. Keep in mind that I cant make it an infinite range. The longer I make the slot the weaker it will be and eventually you’ll have a whole lot of plastic hanging in the air over the butt. Feel free to comment and let me know your thoughts.

UPDATE 10/29/2020: I’ve completed this design and have listed them for sale here: https://buck-rail.com/product/daisy-red-ryder-picatinny-scope-mount/

Posted on 3 Comments

Daisy Powerline 408 Silencer Installation and Test

DAISY POWERLINE 408 SILENCER INSTALLATION AND TEST

In this video I show some quick details about the Daisy Powerline 408 Silencer, how it is installed, and do a firing test. It’s fairly brief and to the point. This is only a prototype and not what the final product will look like. Just a sort of progress report I guess… Thanks for watchin’

Posted on 4 Comments

Daisy Powerline 426 Silencer

Daisy Powerline 426 Silencer

Making the Daisy Powerline 426 Silencer

I’ve had a few requests for a silencer for the Daisy Powerline 426. It’s been a lot of work, but I’ve finally got something that will work without making alterations to the gun itself.

The biggest challenge to overcome is that it needed to somehow mount on the gun without damaging it. The Powerline 415 Silencer presses into the plastic barrel shroud, but there is too little space to do that in the 426. My first idea was to make little nubs that clutch the outside of the shroud. See below.

The first attempt at a gripping adapter

The adpater DID grip the gun, but it wasn’t secure enough. The next idea was to use the under barrel accessory rail along with the gripping nubs.

The first try at a 426 Silencer

The silencer worked and looked really cool and sleek, but I knew a lot of people would be disappointed that they couldn’t mount a laser as well. The next idea was to use the under-barrel accessory rail, and use the silencer as a base for a laser instead.

The finished Silencer Installed on the Daisy Powerline 426

This silencer has been updated quite a bit since this post. You can download the latest 3d print file HERE

Thanks for lookin’!

Posted on 3 Comments

Daisy Red Ryder Under-Barrel Rail Update

Daisy Red Ryder Under-Barrel Rail Update

I’ve been trying to perfect this under barrel rail mount for the Red Ryder. I’m technically on version 6, but the first 5 were essentially the same with small changes. The latest is 2 pieces rather than one. There has been a lot of interest. I’m surprised to find out that folks want to mount flashlights and lasers as well. The more my son uses the first version(view that post here) the looser it gets. It can slide up and down the tube beneath the barrel. It works for him and he really likes it, but he’s pretty easy to please. In this post I’ll briefly cover some of the obstacles and what my brother and I came up with for a solution.


The Obstacles

There are a few problems with a one-piece polymer rail. You can slide the adapter rail down the lower tube or have it snap onto the lower tube.The first obstacle to getting the rail adapter to slide over the lower tube is the tab that is used to weld the smaller tube to the larger. The hole in the adapter needs to allow for the tab to slide through and reduces the amount of surface area for gripping the tube.

Once I got the adapter to slide over the tab the next issue was that the lower tube is not perfectly parallel to the upper. Notice the air gap between the upper and lower tube. If the adapter is made to firmly clutch the lower tube at the front while simultaneously pushing up against the upper tube it will get looser and looser as you slide it toward the forearm grip.

Other Options

Another option is to make the one-piece adapter snap onto the lower tube rather than slide one. Either way, if it can snap on or slide on it can probably snap off or slide off. I don’t like the idea of adding set screws, or gluing, or taping because all of those can damage the airgun and aren’t exactly dummy-proof. I messaged with Cobalt327 from thehighroad.org forum and he confirmed that it’s best not to do anything that would alter the original gun, such as screwing into the forearm grip.

The Solution

Fortunately, I mentioned the problem I’m having with the rail to my brother. He came up with the simple idea of making it a two-piece clamp. The final version is a two-piece adapter that uses screws with embedded nuts to clamp the picatinny rail to the lower tube. I’ve tested it and it is VERY secure. I’ve been pretty busy, but I’ll be posting these for sale in the coming weeks. Thanks for reading and stay tuned!

Posted on Leave a comment

Mounting a Bipod on the Red Ryder

Mounting a Bipod on the Daisy Red Ryder

Why Add a Bipod?

Shooting a Daisy Red Ryder is a blast. For my youngest kids it can be difficult to hold up and takes two fingers to pull the trigger. A bipod is a huge help to get them comfortable and having fun shooting.

The Problem

For the Daisy Buck you can just buy a clamp-on barrel adapter and mount a folding bipod on the adapter. But the Red Ryder has a faux magazine(a little tube under the barrel) that prevents you from mounting a bipod. The only solution is to use a temporary prop or support or cut the faux magazine off and mount the same clamp-on style. Neither of those “solutions” is ideal.

The Solution

So I drew up a model in AutoCAD of an adapter that will slide over the faux magazine. Something like this.

The model in AutoCAD
Setting up for 3D printing

This will allow you to keep the original gun intact while adding an under-barrel picatinny rail. From there you can mount a folding bipod like this on your Daisy Red Ryder.

finished bipod adapter for the daisy red ryder
Finished Bipod Adapter

What do you think? Are you interested in this product? If you are let me know in the comments! Also, I just got a shipment of bipods and red dots that will be listed at an unbeatable price next week! Stay tuned or subscribe to get updates on new products!